Last winter I spent eleven minutes looking for my utility knife. It was on the workbench, buried under a coil of extension cord, a tape measure, two drill bits, and a jar of wood filler I forgot I owned. That was the day I stopped pretending the shelf situation was fine and started seriously looking at pegboard.
A pegboard system is not complicated, but it is easy to get wrong in ways that waste your money and leave you with a wall full of hooks that slide out every time you grab a tool. I have had that version. I also have the version that actually works. The difference comes down to five specific steps, and none of them require more than a free Saturday morning and a basic drill.
Still digging through a pile every time you need to fix something?
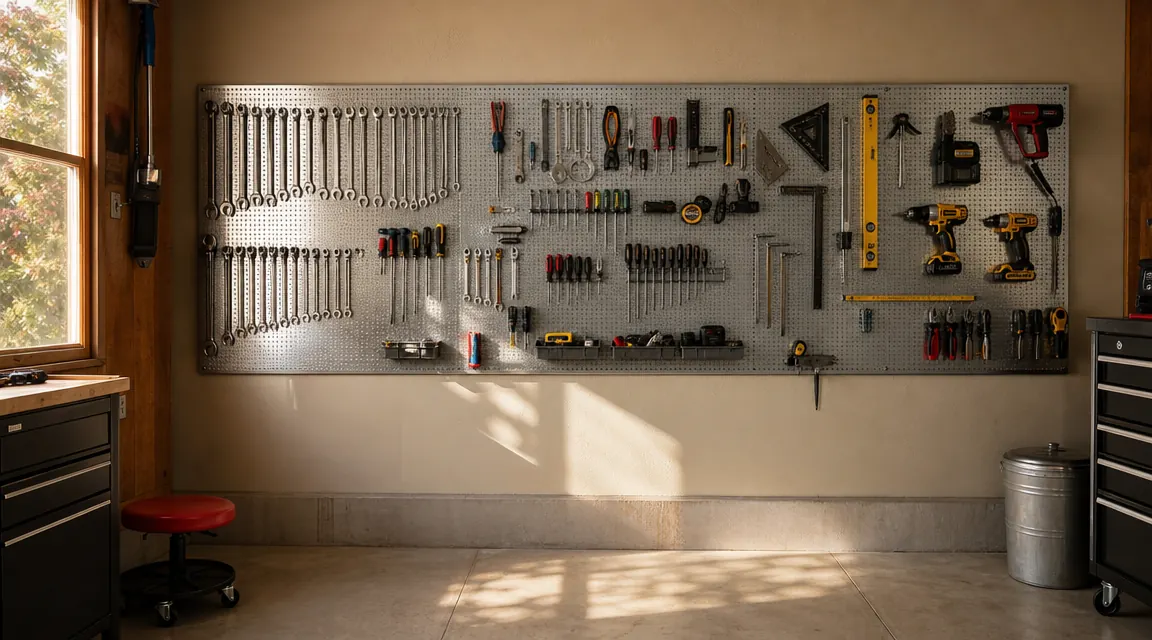
The Wall Control 4 ft. metal pegboard kit is what I mounted on my garage wall. Steel construction, hooks that lock in place, and a modular layout you can rearrange any time without patching holes. Check current pricing on Amazon.
Amazon Check Today's Price on Amazon →Step 1: Find Your Studs and Mark the Mounting Wall
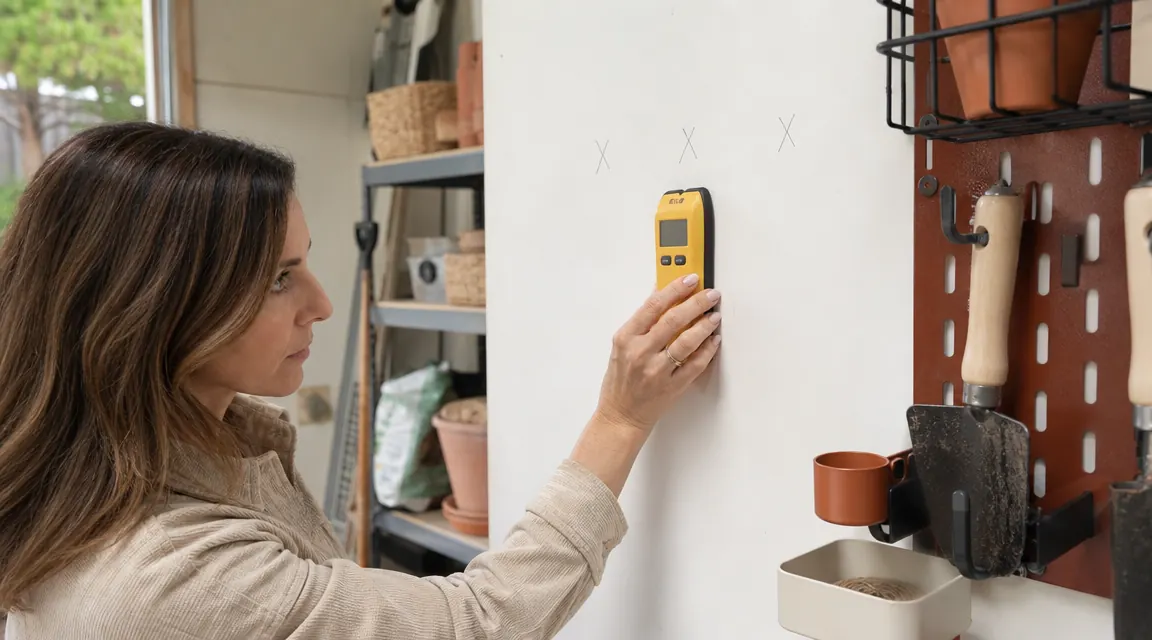
Before you touch a panel, spend five minutes on the wall itself. Garage walls are typically drywalled over 2x4 or 2x6 studs sitting 16 inches apart on center. You need to hit at least two studs per panel to hold real weight. Borrow or buy a stud finder, run it slowly across the wall at chest height, and mark every stud center with a pencil. If you find the first stud and count 16 inches out, you should land on the second. Verify it with the finder anyway, because framing in older garages is not always consistent.
Also check what is behind the wall before you drill anything. Electrical wires and pipes typically run vertically through stud bays but sometimes jump horizontal, especially near outlets and switch boxes. If your garage wall backs up to a bathroom or kitchen, mark those zones and stay a few inches clear of them. For most standalone garages this is not a concern, but thirty seconds with a wire detector is worth it.
One more thing: decide the height before you pick up the drill. I set my Wall Control board so the top edge sits at 70 inches from the floor. That puts the highest hooks within easy reach without a step stool and the lowest hooks at mid-chest when I am standing in my normal working position. Write that measurement on a piece of tape and stick it to the wall. You will thank yourself when you are holding a drill in one hand and trying to remember the number you had in your head ten minutes ago.
Step 2: Mount the Panels Directly to the Studs
The Wall Control metal pegboard uses a mounting system that holds the panels about 5/8 of an inch off the wall surface, which gives you the clearance the hooks need to engage properly. You do not need to add a furring strip backing like you do with standard pegboard. The included mounting brackets go straight onto the studs with lag screws, and the panel snaps into the bracket channel.
Use a level on every bracket placement. I did my first install without checking the second bracket against the first, and the panel sat at a two-degree tilt that caught my eye every single time I walked into the garage. I remounted it in fifteen minutes but I would rather you skip that step entirely. Two people make this installation easier: one holds the panel in position while the other drives the screws. If you are working alone, a couple of pieces of blocking wood propped against the wall can hold the panel while you step back to check level.
Snug the lag screws down firmly but do not overtighten into drywall alone. If your stud finder showed a stud at 32 inches but your screw is pulling soft, back out and shift one inch in either direction and try again. A screw going into real stud framing has a distinct, firm resistance all the way through. Drywall alone feels like you are drilling into soft cheese. If you hit soft cheese, the bracket needs to move.
Step 3: Sort Your Tools Before You Hang Anything
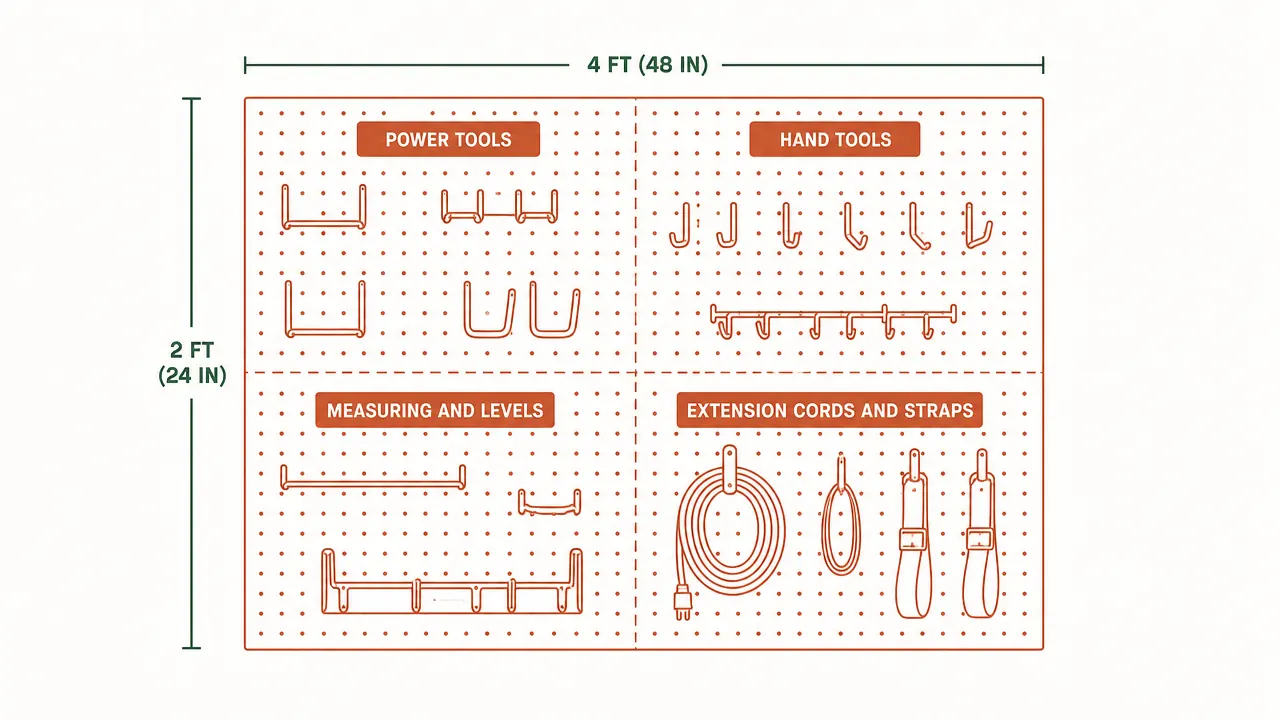
This is the step people consistently skip and consistently regret. Before a single hook goes on the board, pull every tool off whatever shelf or floor space it currently occupies and sort it into four rough groups: power tools, hand tools, measuring and marking tools, and miscellaneous hardware or cords. Lay them on the workbench or on the floor in front of the board. You are looking for two things: what you actually reach for every week and what has not moved in over a year.
Anything you have not used in over a year goes into a bin for donation or a shelf in the back corner. I pulled four tools off my own board during this sort that I had been hanging out of habit and never actually touched. That freed up a full row for my brad nailer and its accessories, which I had been keeping in a cardboard box on the floor because I wrongly assumed I was out of wall space.
Now group the keepers by how often you use them. Most-used tools belong in the prime zone: the section of board between shoulder height and elbow height when you are standing at your normal working position. Less-used tools go higher or lower. Heavy tools like a full-size circular saw belong on lower hooks so you are not reaching overhead to pull something with real swing weight.
Step 4: Place Hooks by Tool Shape, Not by Looks
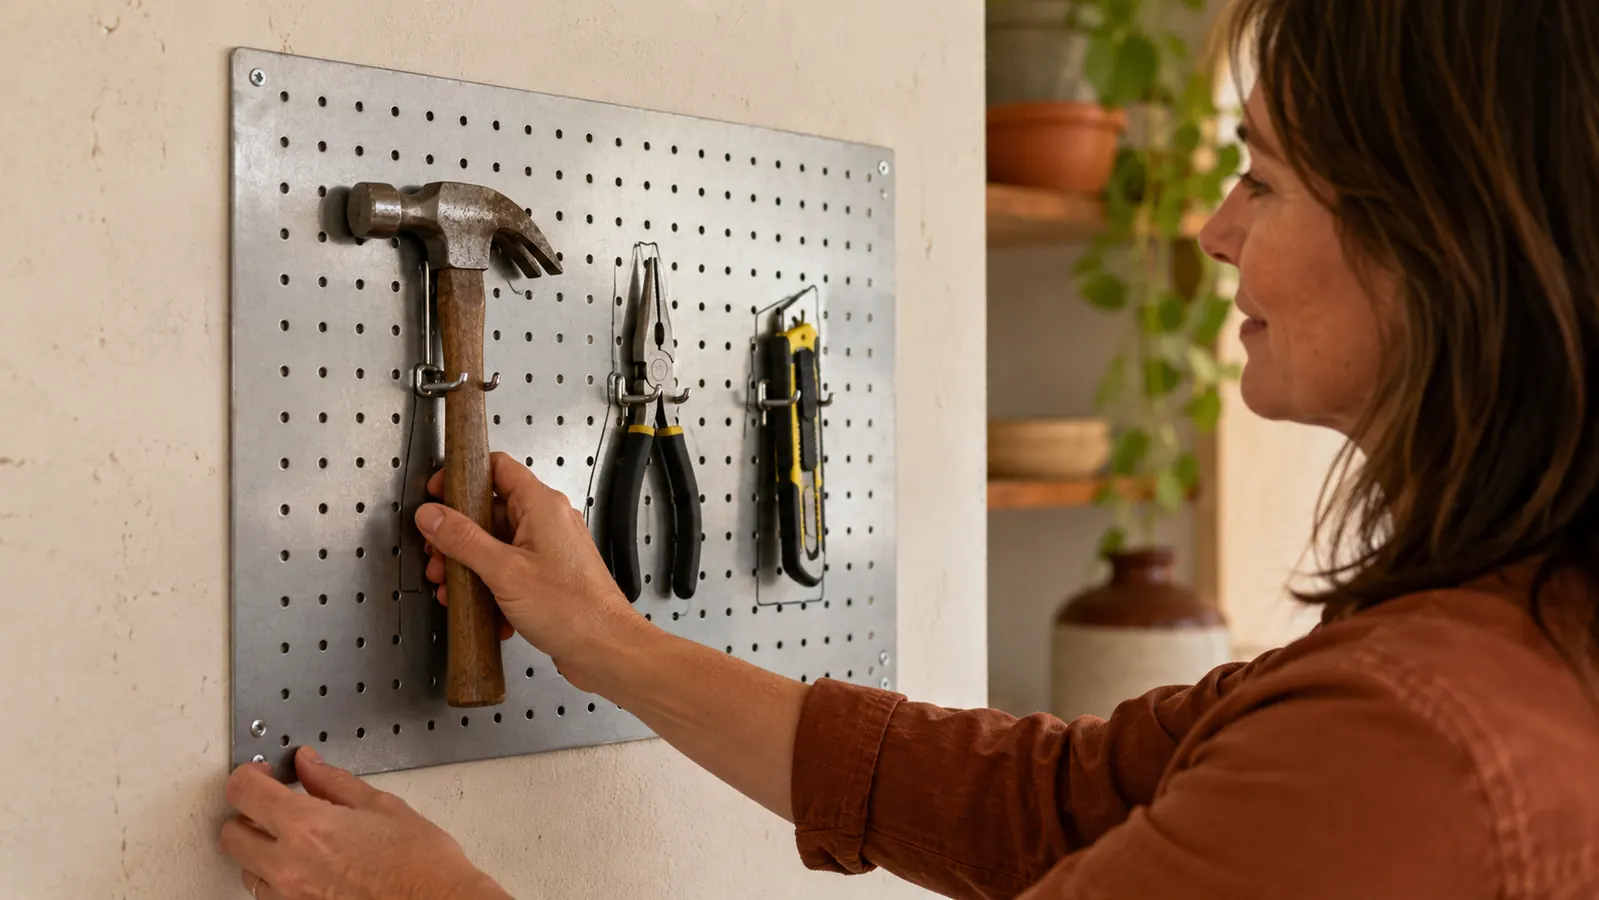
The Wall Control accessory system uses a two-lug locking tab that snaps into the panel holes and will not back out when you pull a tool. This is the single biggest functional difference between metal pegboard and standard pegboard from the hardware store. Standard pegboard hooks rely on friction fit, and after six months of regular use, every hook in the bottom third of the board will have migrated two inches to the side. Metal pegboard hooks stay exactly where you put them.
Choose hook type based on tool shape, not aesthetics. Flat J-hooks work well for hammer handles, screwdrivers, and pliers. Angled double hooks handle power tool cord wraps and extension cords better than anything else in the kit. The included shelf brackets are sized for small parts bins, not for resting heavy flat tools, so use them for a drill bit organizer or a container of zip ties rather than anything that weighs more than a pound.
Here is the step nobody mentions in any tutorial I have ever read: trace each tool's outline on the board with a paint pen or marker before you commit the hook to its final position. It takes ten extra minutes and it saves you from living with a layout you hate for the next six months. When you can see all the silhouettes at once, it immediately becomes obvious if your drill and your level are competing for the same space or if you have given up a full column to a hand saw you use twice a year.
Trace each tool's outline on the board with a paint pen before locking in the hooks. Ten extra minutes saves you from living with a layout you hate for months.
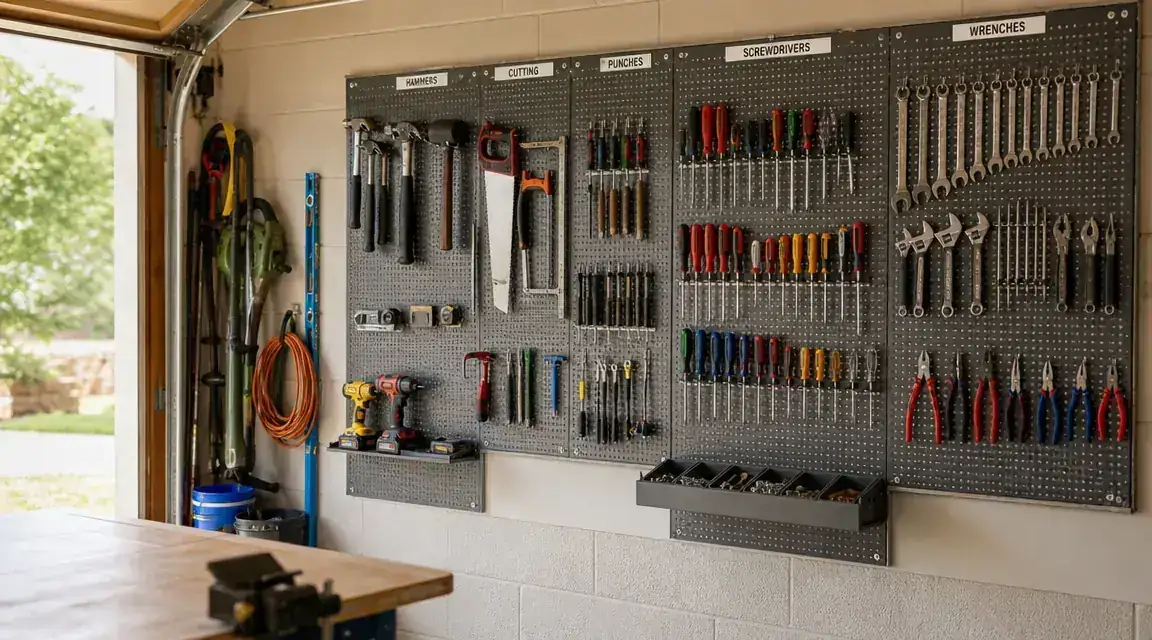
Step 5: Label Your Zones and Lock In the Return Habit
A pegboard without labeled zones is a pegboard that will be a mess again within ninety days. I use a label maker and a strip of white label tape at the top of each zone: Power Tools, Hand Tools, Measuring, Cords. Four labels, about ten seconds of work. Now when anyone else puts something back in the wrong spot, there is a clear visual reference that fixes it without a conversation.
The return habit is the real work and the thing no organizing product can do for you. For the first two weeks after I mounted my board, every time I used a tool I made a deliberate point of hanging it back before walking away from the workbench. Not after dinner. Before I left the garage. That sounds almost embarrassingly simple but it is the only reason the system has stayed intact for three years. A pegboard that actually works long-term is not about the hardware. It is about the fifteen seconds of discipline at the end of every project.
One last practical move: add a hook near the garage door for your work gloves and safety glasses. These are the items you need before you even get to the board, and if they live in a drawer somewhere they are the first things to disappear from the system. Hanging them at the entry point of the workflow means you actually put them on.
What Else Helps
If you are weighing the Wall Control metal pegboard against a standard pegboard set from the hardware store, the practical tipping point is how many tools you have and how hard you use the space. Standard pegboard costs less up front and works adequately for light loads: a couple of screwdrivers, a hammer, maybe a few wrenches. Once you have a dozen or more tools on the same board, or anything heavier than a basic hand tool, the hooks on standard pegboard shift constantly and the board itself flexes under load. The Wall Control steel panel system holds its shape. After three years on my wall the panels have not flexed, not a single hook has migrated, and the finish looks the same as the day I mounted it. The higher initial cost looks different when you factor in the cost and time of replacing a cheap board that eventually gets tossed. For a full breakdown of every component in the kit, see my Wall Control pegboard long-term review. If you are still deciding between pegboard and open garage shelving, I covered that trade-off in detail in 10 reasons garage pegboard beats shelves.
Ready to know exactly where every tool is the moment you need it?
The Wall Control 4 ft. metal pegboard kit includes panels, mounting hardware, and a starter accessory set. Rated 4.7 stars across nearly 6,000 verified reviews. Check the current price and bundle contents on Amazon.
Amazon Check Today's Price on Amazon →